Valentine’s Day has to be one of the craftiest holidays of the year. Remember those elementary school days where you’d stay up late the day before the big Valentine ’s Day party, preparing all of your valentines and creating your own card box? I still remember picking special ones with certain sayings for my friends, and of course, making sure my crush received the best/funniest one. I wonder if kids still make valentines for each other? I guess I’ll find out when my daughter is old enough to go to school.
I’ve found getting crafty for Valentine’s Day is not just for children, but adults, too! As a matter of fact, before my husband and I got married, I relived my childhood one year and gave him a homemade valentine made out of red construction paper with the definition of love on it. SO cheesy, but I love cheesy romance!.
This year, on top of making my valentine and little valentine something homemade (dessert or a card, or both if they’re lucky), I decided to decorate the house to get in the spirit. I was on the fence at first, but taking the Christmas decorations down made the house really bare and I miss the clutter and color!! To start jazzing the house in all things pink and red I created a couple of homemade heart banners to hang around the house. They are far from perfect and some of the edges of the hearts are not even, but that’s what Valentine’s Day is about, right? Hearts come in all shapes and sizes (cheeseball!).

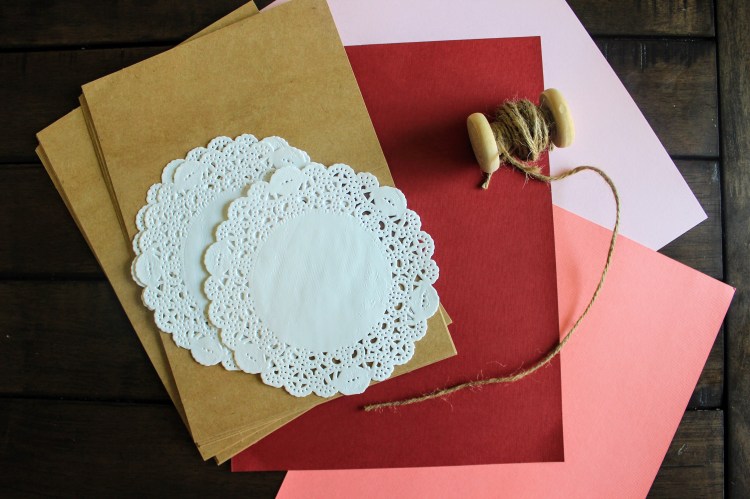
All you need to make this banner is construction paper, paper dollies or lace, cardboard card stock, a glue stick, pencil, scissors, a hole punch and string. It’s super easy to put together, it may just take some time to perfect the hearts.

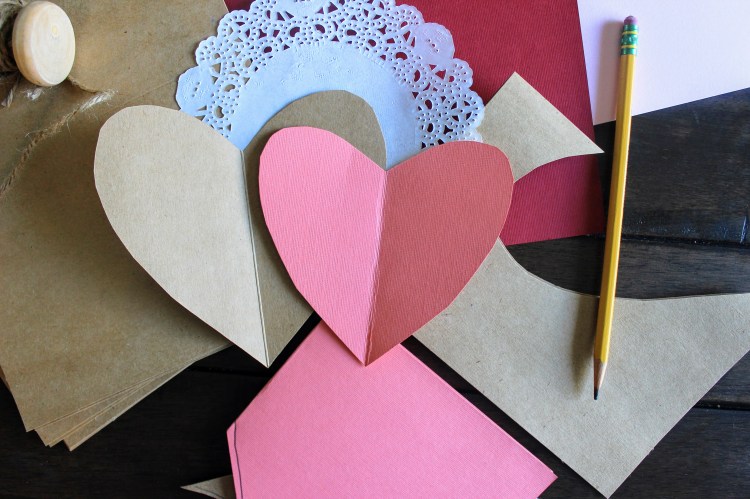
First, I used a heart-shaped cookie cutter to start to ensure my banner was the right size and shape. I’d definitely recommend doing so. The traditional way (folding the paper in half and tracing a heart) works well too. I did this for the cardboard stock (the background of the banners). I cut out the hearts and set them aside.
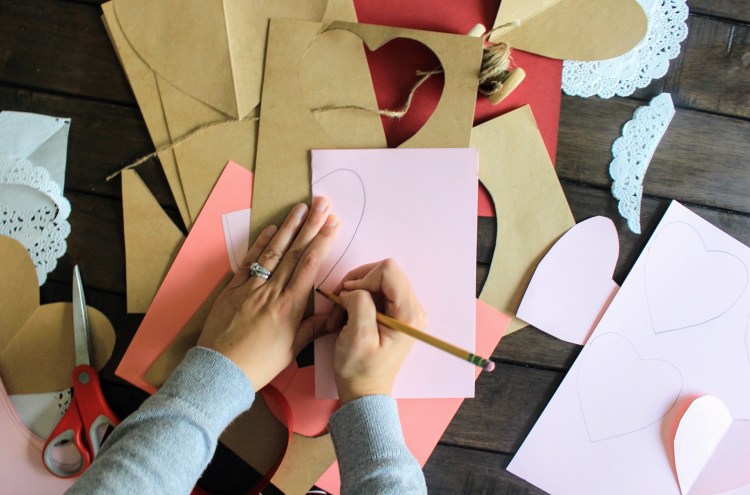
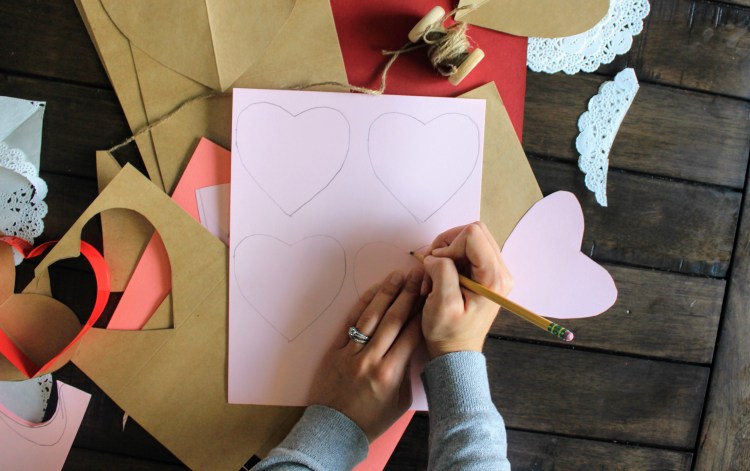
Next, I folded one of the pieces of colored paper in half and tried my best to trace a smaller, similar heart shape to place on top of the cardboard card stock. This may take a few tries, so don’t get discouraged! I cut out the heart and used it as a stencil for the rest of the colored paper and paper dollies/lace, repeating the above step and cutting the rest.


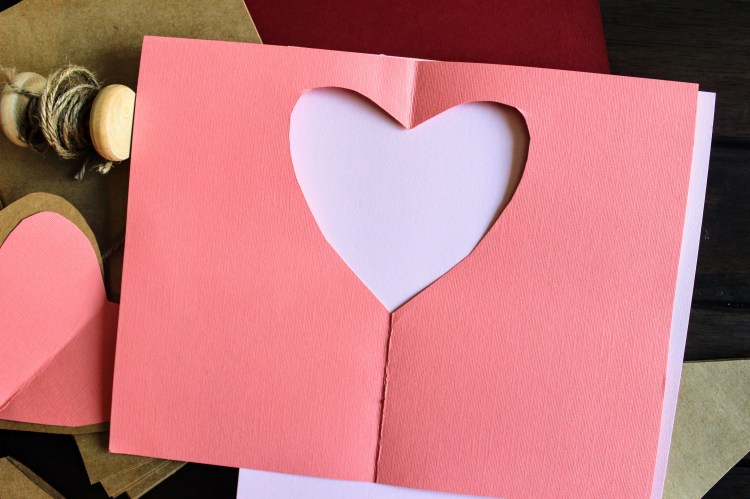
After all of the hearts were cut, I glued each on the top of the cut out cardboard hearts and set aside to dry a little. Next, I punched two holes into the tops of the cardboard to create a place for the string to go.

Finally, I strung the string through the banner.

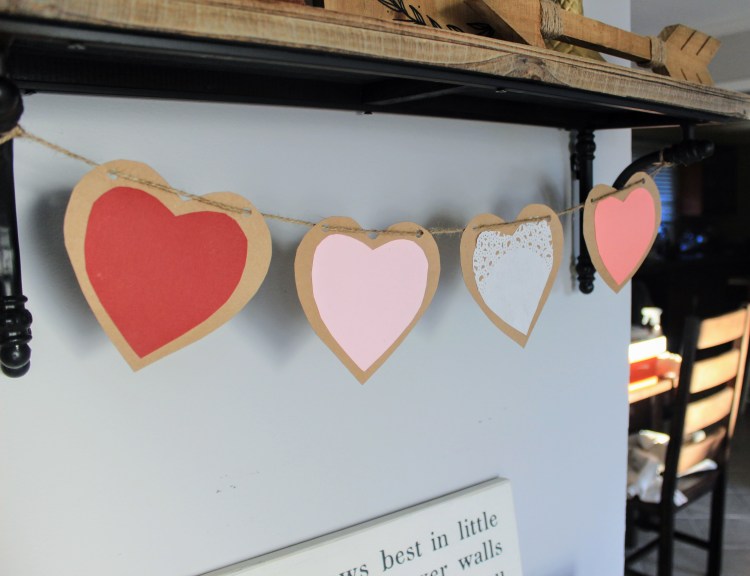
That’s it! Super easy and it looks adorable around our house. If you happen to make this banner, be sure to tag your photos with #marinamakesdiy.


In my kindergarten room I encourage home made cards for Valentine’s Day. They all love buying the cartoon ones and that’s okay so I tell them to write a note to go with it too 🙂 thanks for sharing this banner I need to make one!
LikeLike
That’s really sweet! I love that. You should make one!
LikeLike