I can’t believe our daughter is old enough to be running around already. It seems like just yesterday we were trying everything we could to get her to crawl. Cue my ugly crying face…
Now that she’s experienced all of the holidays at least once, I’ve enjoyed looking back on all of her “firsts” when each holiday rolls around. I recently looked at last year’s Easter pictures- she was sitting up and barely mobile, and was wearing the cutest blue romper. She wasn’t very interested in her Easter basket, but was so happy. It brings back such great memories.
As much as we miss her being that little, each year comes with new activities and memories for all of us to enjoy together. This year, I’m really looking forward to us reading her the story of Easter and Jesus, giving her the Easter basket we put together and doing an Easter egg hunt in our backyard.
While searching for Easter decorations for our house, there were a couple of places (Home Goods and Target in particular) that sold Easter egg hunt signs to create a little trail for hunts. I automatically fell in love with the idea of creating a trail for our daughter and decided to make a pit stop at Hobby Lobby in an effort to find supplies to make my own.
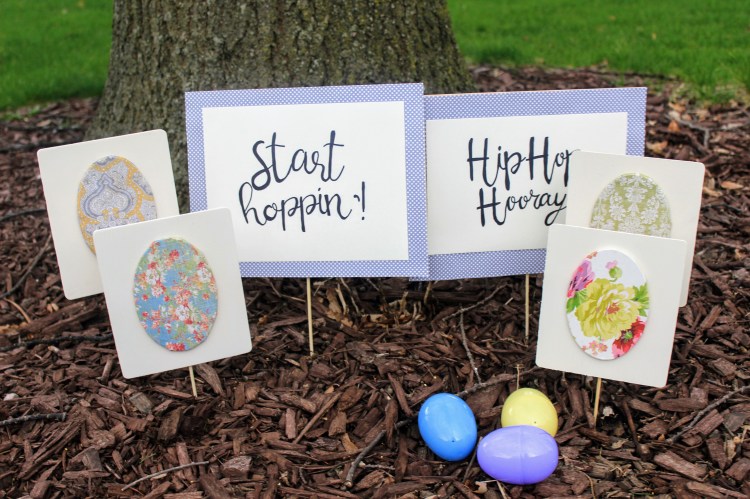
Making my own really was simple (didn’t take more than an hour or two, which can totally be done during nap time), and I mean it when I say that. I painted a couple of wood boards, glued some scrapbook paper and attached BBQ skewers to each of my “signs” to allow them to stick in the ground. In addition to start and finish signs, I created signs with eggs (oval shapes) to mark where we’d place the eggs.
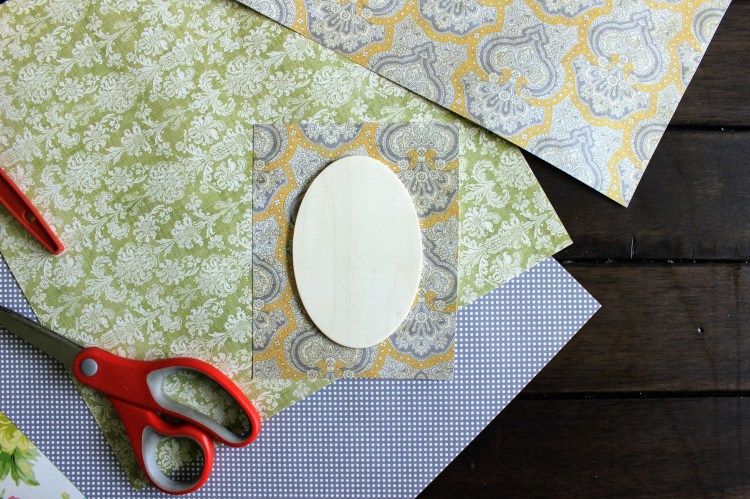
To make my Easter egg hunt kit, I used four small and two medium-sized pieces of plywood (bought from Hobby Lobby), four wood oval plaques (bought from Hobby Lobby), ivory paint, various patterns of scrapbook paper, BBQ skewers, a hot glue gun and Mod Podge.
To make the signs, I followed the below steps:
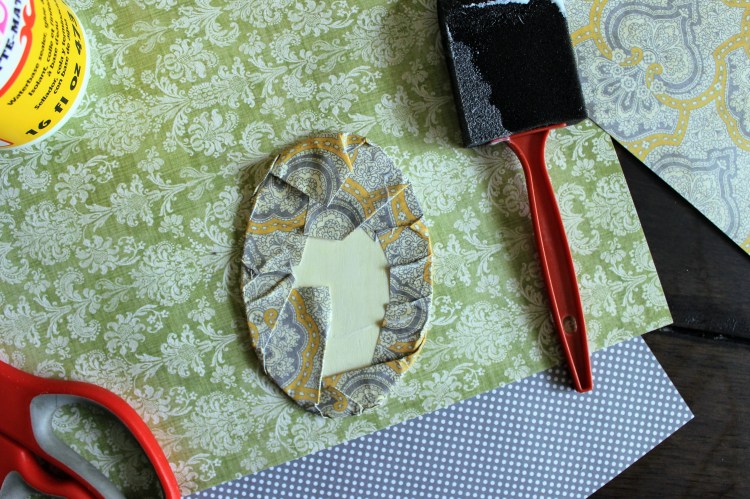
I painted all of the rectangle pieces of plywood with cream paint. While waiting for them to dry, I cut pieces of scrapbook paper (small, but big enough to cover the oval plaques) and glued them to the oval plaques with Mod Podge.
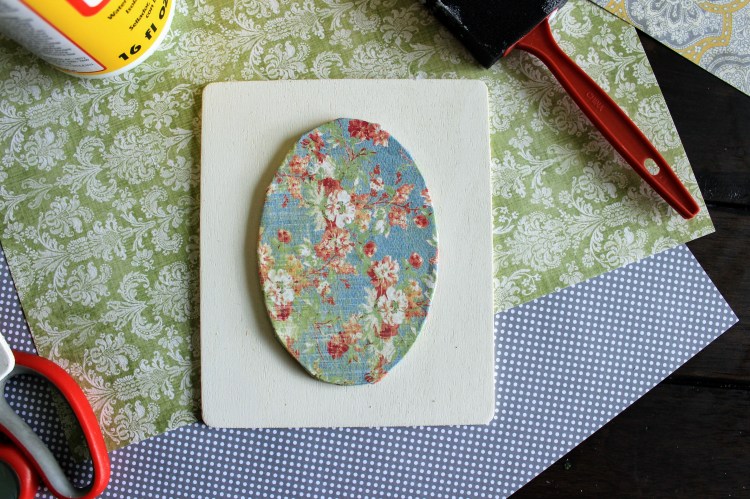
I glued the oval plaques to the rectangle pieces with my hot glue gun.
Finally, I glued the skewers to the back of each sign. I repeated the above steps with all of the rectangle pieces and oval plaques.

To make the start and finish signs, I glued scrapbook paper to the two medium pieces of plywood (measuring it out properly) and added a piece of ivory paper on top to write the start and finish language (you can easily find a font you like and print it out instead of writing it on your own). I finished by gluing the skewers to the back of the signs.
If you plan on hosting an Easter egg hunt this year, and end up making your own DIY Easter egg hunt kit, don’t forget to tag #marinamakesdiy!

