
I am that mom that gets very into valentines every year. It’s a tad bit ridiculous, but I can’t help it. I still remember my excitement making my valentine’s day box as a kid. My thrill for this holiday has lasted, and as an adult, I love getting creative with all of the puns and browsing through the clever downloadable cards.

Last year we made these valentines and attached name keychains to a card that said, “you have the key to my heart” and filled bags of popcorn that were attached to cards that said, “you make my heart pop”.

This year we got all kinds of fancy and made heart-shaped bath bombs. We used Sweet Red Poppy’s tutorial which was super easy to follow and included all natural ingredients (which is what we were looking for). Our valentines this year will be attached to Olive and Eve Co’s You Color My World Cards!! Their valentines cards are so fabulous. I was very tempted to buy them all because of how cute they are.
To make the bath bombs, we used (below are affiliate links):
– Silicone heart molds,
– Food grade baking soda
– Citric acid
– Lavender essential oil
– Witch hazel spray
– Mica powder for color
We doubled the recipe and made 8 heart bath bombs (medium-size). To make them, we whisked together 2 cups of baking soda and 1 cup of citric acid in a bowl. Next, we added 10 drops of lavender oil and whisked the mixture again. We divided the mixture up evenly into smaller bowls for each color we wanted to make. We placed about 1 teaspoon of mica powder to each bowl. The amount of powder you use will vary depending on how many bath bombs you’re making in a specific color. If you’re making more than two, you will likely need more powder, but if you’re making one, you may need less. I would recommend starting with a little and adding more to achieve the color you want. Mix the color into the baking soda/citric acid mixture completely.
Working one color at a time, spray the tops with witch hazel. Using a fork, smash the witch hazel into the dry mixture, almost like you’re mashing an avocado. You will likely need to spray more witch hazel. Again, start with a little and add as you go. You almost want the consistency of wet sand or kinetic sand. To test if you have the right consistency, squeeze the mixture into your hand. If the mixture keeps it’s shape, it’s the right consistency. Press the mixture firmly into the molds (please note, a lot of ours expanded, so leave some room at the top). Repeat this with the other colors and let the bath bombs sit out to harden for at least 5-6 hours. If you can, let them sit overnight.
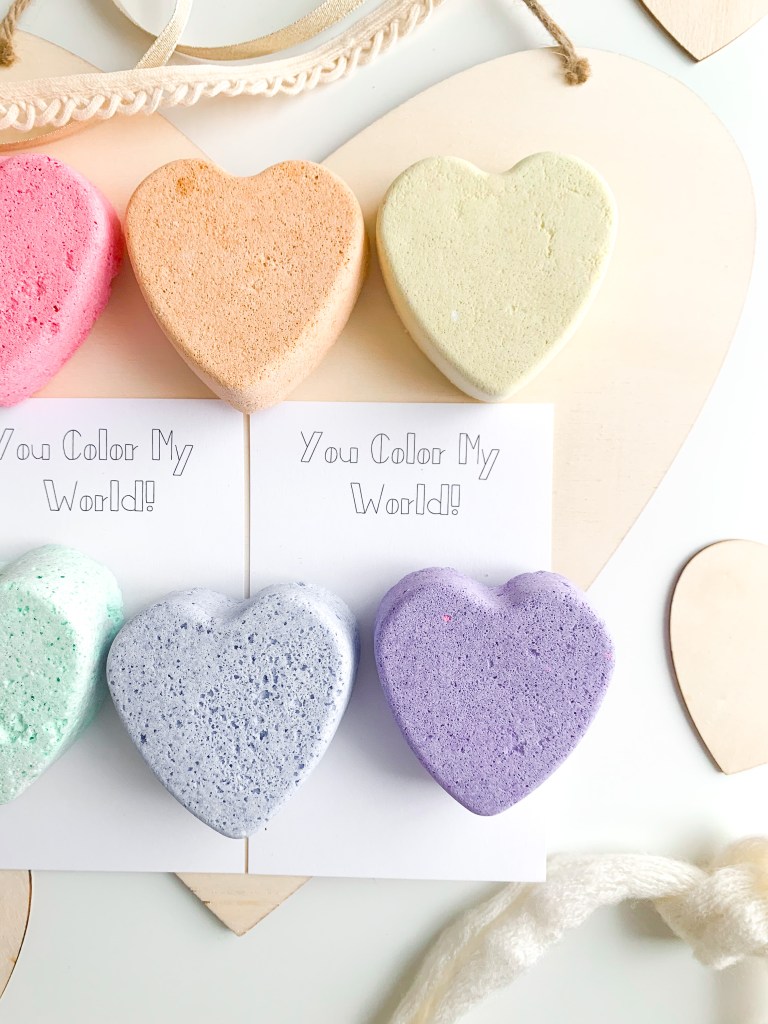
It was so easy to put these together and this is something I know the kids will be asking to do again in the future. They love bath bombs and had so much fun testing out the ones we made. They made the water really pretty colors too. If you end up making these, I’d love to see your pictures – don’t forget to tag #marinamakesdiy!

